
In these somewhat boring days of social-distancing and my voluntary stay-at-home, I was glad to have two younger friends in their late sixties visiting me. They are still working and in the middle of our familiar idle chat I came to know that they were having a hard time typing out all the text in some standard formats in pdf documents in order to prepare new ones! So I showed them how to do that kind of thing by converting pdf to open document format. Or if the source documents were not in digital text format, to take photos of them and then convert them into text using OCR via Google Doc. Then to download them in odt format. I’m documenting these little tricks, lest they forget. I hope that somebody will improve on them.
1. True or Normal or Real PDF documents
These are made up of digitally created text. All you need to do here is to copy the text from these files and paste them in a blank page in a word processor. For example, you could Microsoft Word. If you don’t have a licensed Microsoft Word installed, I suggest the Open Source LibreOffice.
1.1. Copying text from PDF document
Here, I open the pdf file with Adobe Acrobat Reader and select all text. Typing the keys Ctrl+C copied them to clip board.

1.2. Paste text to a new document in LibreOffice
Create a new document in LibreOffice Writer and paste copied text. The fonts and text are Ok. All you’ll need to do is to format the heading, paragraphs, etc. You can do all the editing you need.

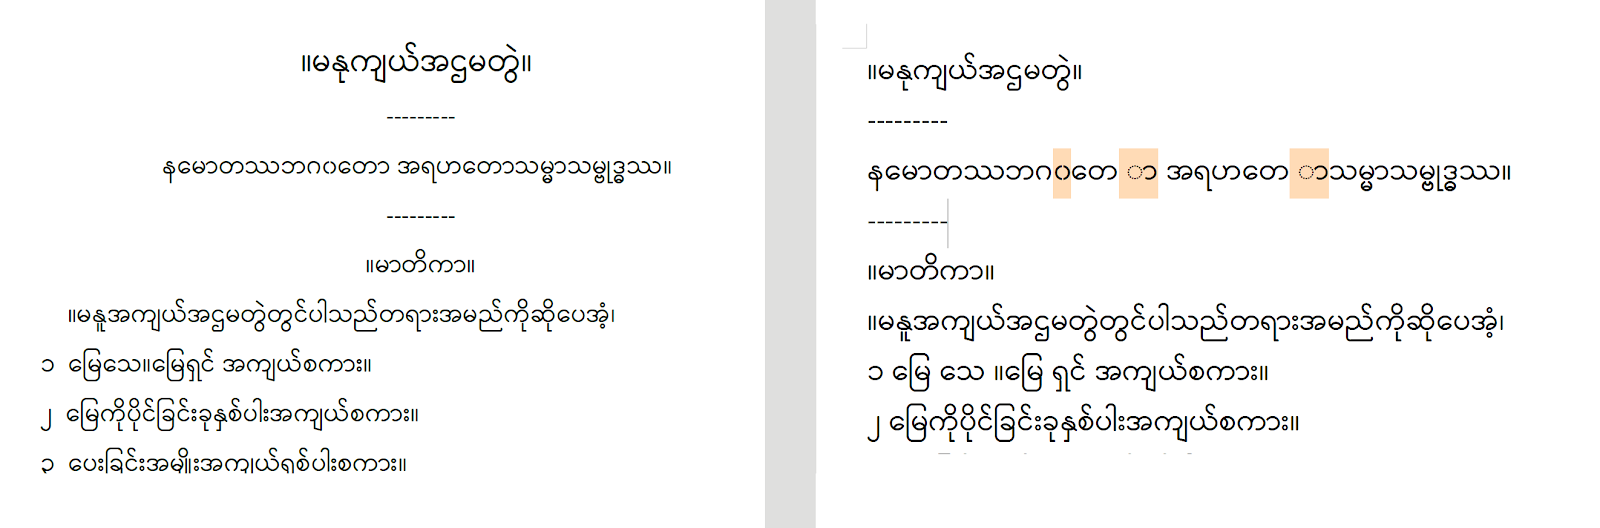
In Myanmar language text the original in pdf (left) copied and pasted (right) shows some minor character errors in addition to format of lines. The Myanmar text once pasted to the blank document should be changed to the original font (here: Pyidaungsu Myanmar Unicode).
1.3. Copying only a part of the PDF file, a paragraph, or only a few words
Adobe acrobat reader doesn’t allow copying only a part of the PDF file. If you want to do so a simple method is to open it in the Google Chrome browser and make your copy on the opened page.
1.4. How to extract only one or more page(s) from a true PDF document
You can use the open source software PDFsam. It can split and merge PDF files.
2. Scanned or image only documents in PDF or other formats
Most of the pre-Unicode digital documents in Myanmar language and scanned PDF documents or scanned text in other graphic formats fall in this category. This means they need to be converted to digital text through OCR (Optical Character Recognition) software.
2.1. First step: Create graphic image(s) of a page of text or a document
You could directly use OCR on text in scanned PDF document. It is probably fine for such text in English language. But my experience (limited) with Myanmar language shows that scanned PDF text converted to an image format (such as jpg or png) gives better result.
In this age of smartphones, taking the image of any printed text is easy and adequate for OCR. For creating image files I used GIMP the free and open source image editing software.
In this age of smartphones, taking the image of any printed text is easy and adequate for OCR. For creating image files I used GIMP the free and open source image editing software.
- for a scanned PDF file, you can directly open the file in GIMP; it will show separate pages of the file and you can select the page(s) to open in GIMP. You can edit and save each image. For example, I normally save them into png format.
- for printed documents you can take photos with your cell phone, import images to your PC, and process them with GIMP and create image files.
The following picture shows how I created a single colum text image (2) from a two-column source (1) to facilitate the OCR operation.

2.2. Second step: Upload the graphic image or file to GoogleDrive
For this you need to have a Google Account, and have the internet connection running. You open the GoogleDrive and upload your image file(s).
2.2.1. Click “New” in GoogleDrive

2.2.2. Upload image file(s)

Here I’ve uploaded my file in PNG format that have been created earlier with GIMP.

2.2.3. Running OCR on the imported image
Now I right click that file:

From the menu that appears, I select Open with/Google Docs. This causes Google Docs to run OCR on my image file. The image is just for one page of document. I think it will be wise to work page by page. That way, error checking and editing would be easier.

2.2.4. Download the completed file for editing with a word processor
Now the OCR has been completed. I’ve reduced the size of the text-image to be able to show it as well as the converted text below it. You could do the editing of the document here with Google Docs. But I prefer editing with a Word Processor after this file has been downloaded.

I prefer working with a free Open Source word processor, so I downloaded the completed file in ODT format.

After clicking the option to download the converted document, you will find your downloaded file in the “Downloads” folder. Now you can open it with LibreOffice or any other software that could handle the ODT file format.